Monday, December 8, 2014

Little Books Part 1 By Shells in the Bush

Now you're in for a real treat! 


This project will make you want to get started right now!!


Hi everyone!!
I'm Michelle Reynolds from www.shellsinthebush.com/ and the Cre8ive Klatch Team.
I'm here today to show you how to make Little Books and to inspire you to create your own.


Part 1 will show you how to make different backgrounds and pages for your book.

Part 2 will give you some tips to make your own washi tape.

Part 3 we will be binding the book together - no needles required!!!

Supplies - will vary depending what you use to create your pages.

~ Index Cards or cardstock cut into 8" x 4" = 20cm x 10cm rectangles


1. Index cards which have been gelli printed and brayered - using the left over paint not needed on the gelli plate.


2. Index cards which have been sprayed with ink spray, you could place a stencil or mask on top first. From here you could stamp them, collage on them, leave them as is for journaling on or writing poetry or quotes.


3.  If you have any punches then create some cut outs and glue them to the index cards. I decorated the hexagonals with a bee which is a free printable I found on Pinterest.


4. Glue paper napkins to index cards then add ephemera to make a picture. The ladies are free printables I found on Pinterest. Download them and put them onto a Word Document or Pages in Mac, you can them determine their size - I made mine 5-6 inches which leaves an inch above and below. I also added some lace and small doilies.


5. Glue book pages to index cards then decorate.  Use vintage books or old dictionary pages. Decorate with paint, gesso, stamps, gel pens or washi tape.


Check out second hand book stores, garage sales, op shops or fairs for vintage books.


Three of the above pages were given to me in happy mail - where you swap ephemera and bits and pieces with others - postage stamps, punch cut outs, lace, washi tape etc.  I joined a group earlier this year and have participated in many swaps and have three baskets of goodies - these are great to go through when looking for pieces to collage to your cards.


So there are some ideas of what you can do to decorate your pages for your little book. You could also choose a theme or just one way of doing your background too. You may wish to include some blank pages for writing on too if you have decorated both sides of the card.

How many pages? 10 - 15 is good


My next tutorial will show you how to make your own washi tape.


I hope you have fun creating your pages for your book.  Please join our Cre8ive Klatch FaceBook Group and share your creations - I would be thrilled to see them and I'm happy to answer any questions you may have.

Thank you.

Michelle.

PS If you would like to buy some gelli prints to decorate your pages or in your art journal, for collage and mixed media art then check out my Etsy store for some great Gelli Print Packages.

Thursday, December 4, 2014

Gr8full Cre8ives In December

Today I'd like to revisit our Gr8full project with a bit of an addition.


December's theme is 

celebration.

Which is what we all should be doing this month...right?

For me December is the hardest month to stay focused on what I really need to remember..it's busy, you're running aorund like a chicken with your head cut off, the tree, the decorations, the shopping...ugh! 
I'm tired just thinking about it! 

How can I remember all the little things that I'm gr8full for?
All the things worth celebrating?
 I really want to make an effort this year to keep these things
 in the forefront of my thoughts.

Sitting down at the computer the other day I decided to make up a daily list of prompts so I could have a few minutes of reflection. 
A few seconds of inner meditation on the celebration of the season.

Here's what I came up with.


Please feel free to print this up and share by 
clicking on the picture or on the following link.

Now you can use these just for your personal and daily routine. No one has to see or know. But also I would love it if you would share your thought or pictures with our FB group. Each day has a word and a thought on a photo idea that would be a great addition into Instagram. 
(Just remember to use our tags so we can see what incredible things you come up with)  
I'm going to try to do each day. 
Maybe some to share and some to keep to myself.


I also put together a blank copy so you 
can fill in your own gratitude list. 


Be cre8ive and fill each day with 
something that means something to you.
(you can click the picture or the link below for a printable)

The more gratitude we throw into the universe the better!

Until next time,

Monday, December 1, 2014

A Shopping Side Trip: The Klatchapalooza Handmade Art Market

Today is Cyber Monday for those of us who dislike crowds and want to shop in our jammies!

Today is also the last day of this event and we hope you'll come on over and take a stroll through our virtual "shops!"


You can also come on over to the FB group and chat with us about all things cre8ive!!


See you there!


Thursday, November 27, 2014

Wednesday, November 26, 2014

Peace and Calming Perfume Pots by Lori Leissner

This has been one of our most popular posts to date and well worth sharing again.


This is the perfect Christmas gift or stocking stuffer. 

Enjoy!


I have become highly sensitive to scents. It's gotten bad in the last few years.  The laundry aisle at the Walmart can send me into a headachy, nose leaky, sneezy, itchy mess. But I recently discovered therapeutic grade essential oils. I have scent back in my life! Now I'm having some fun with them.


I can't believe how fast and easy this project is!  I don't cook very much, so I'm skeptical of any project that requires a live flame.  This was done, start to finish, in 20 minutes (not including decorating the top of the container), so it's perfect for quick gifts for lots of occasions.  Or you can do what I did and add it to a fun giveaway on your blog (hint...click the link, leave a comment and you might win.)


You'll need:
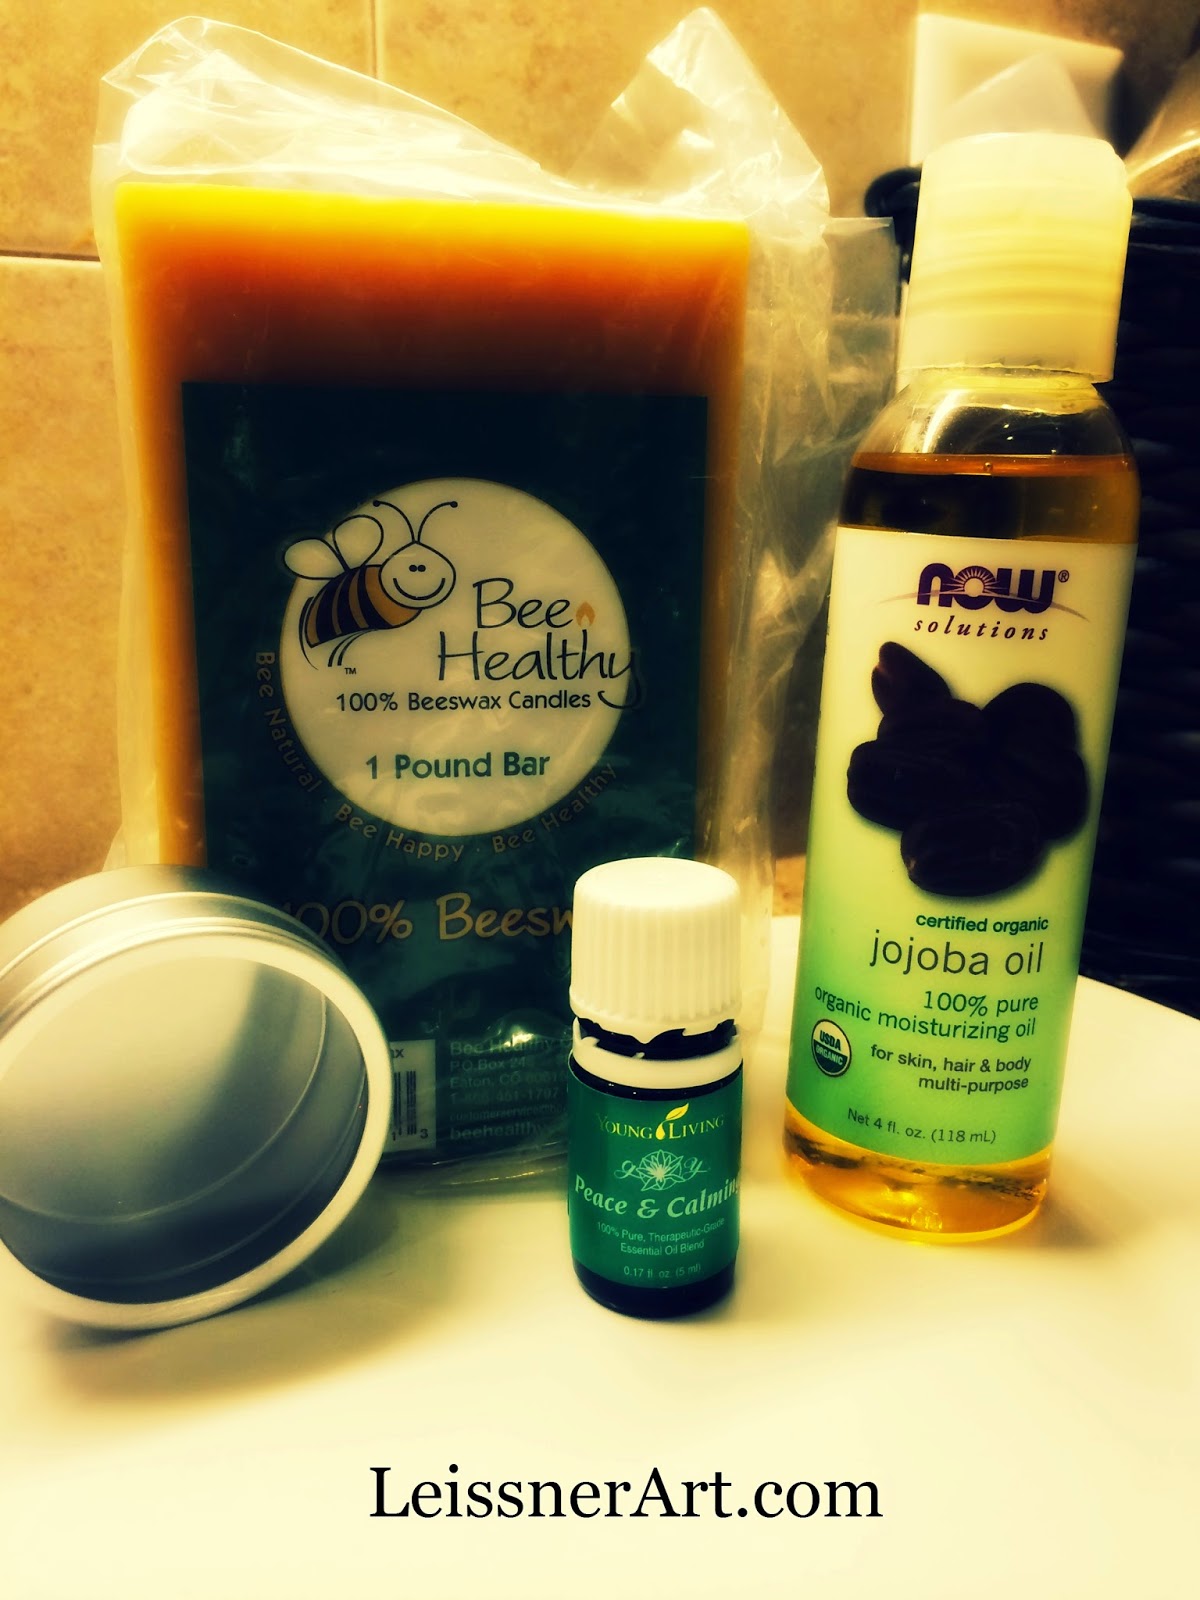
  • Beeswax--Not a giant hunk like this one.  You're only going to use a tablespoon or so.  I used four tablespoons to make three pots of perfume in these 2 inch containers.  I got a block because I tend to overbuy everything and who knows when I might need a pound of beeswax?  I didn't want to buy the kind from the craft store that had a warning label that said, "NOT FOR COSMETIC USE", so I got this at the health food store. There was no warning label. 
  • Jojoba oil--Spend a little more and get organic.  If you are going to the trouble to make something, make it good.
  • Essential Oil--I use Young Living, but you can use other kinds as well, I'm sure.  Just make sure to get all natural, therapeutic grade essential oils. You'll use less, and there'll be no yucky stuff in it.  This is one is called Peace & Calming and has a nice citrusy scent.  I need a lot of both peace and calming, so I thought it would be a good choice for my first attempt at a solid perfume.
  • A container for your solid perfume--It can be any kind of small container that's not made of plastic. You could even reuse your mini Altoid tins.  I got these 2 inch tins from Hobby Lobby.
  • A stir stick--You'll need something disposable you can use to mix the oils with the melted wax.
  • A small glass jar--To melt the wax in.
  • A small saucepan--To heat the water to melt the wax.
  • A shot glass or similar--I discovered trying to drip the oil drop by drop into swiftly hardening wax was not going to work. Collect the drops in a separate small container to make adding them to the wax faster.


 Directions:

1.  Place water in the bottom of a shallow saucepan and place on medium heat.
2.  Chip off the equivalent of 1 Tablespoon of beeswax.  (I used 4 T to fill 3 two inch containers, so adjust as you wish).
3.  Add the wax to the small jar and place in the water. 
4. Add 1Tablespoon jojoba oil to the jar with the wax. (Or the same amount of beeswax you used if you used more.) 
5.  While wax is melting, drip 8-15 drops of essential oils into a shot glass or other small container. (Don't forget to add more if you used more than a tablespoon of wax/jojoba.)
6.  When wax and oil are fully melted together, remove from heat.  


7.  Pour essential oil into the wax mixture and stir well with stir stick.
8.  Pour your lovely smelling liquid wax into your perfume containers.
9.  Let stand until hardened.  It doesn't take very long.  You'll be tempted to poke the wax before it dries.
10. Don't poke it.

I didn't take any pictures while I was trying to cut a print of my artwork to fit in the top. Trying to get a perfect circle in the perfect size is not that easy.   You are probably better at math than I am, though.  It'll be a snap. So...

11.  Decorate the top of your lid. 

12.  Be blessed.


Follow this blog.  There are lots of talented ladies that are going to share fun and fast projects over the course of the Fall and Winter.  Don't miss them.

And join our FB group so you don't miss anything! Cre8iveKlatch

Have a great time, cre8ive friends!

<3 Lori

My Places:
My website--LeissnerArt 
My Etsy Shop 
My Facebook Page